.png)
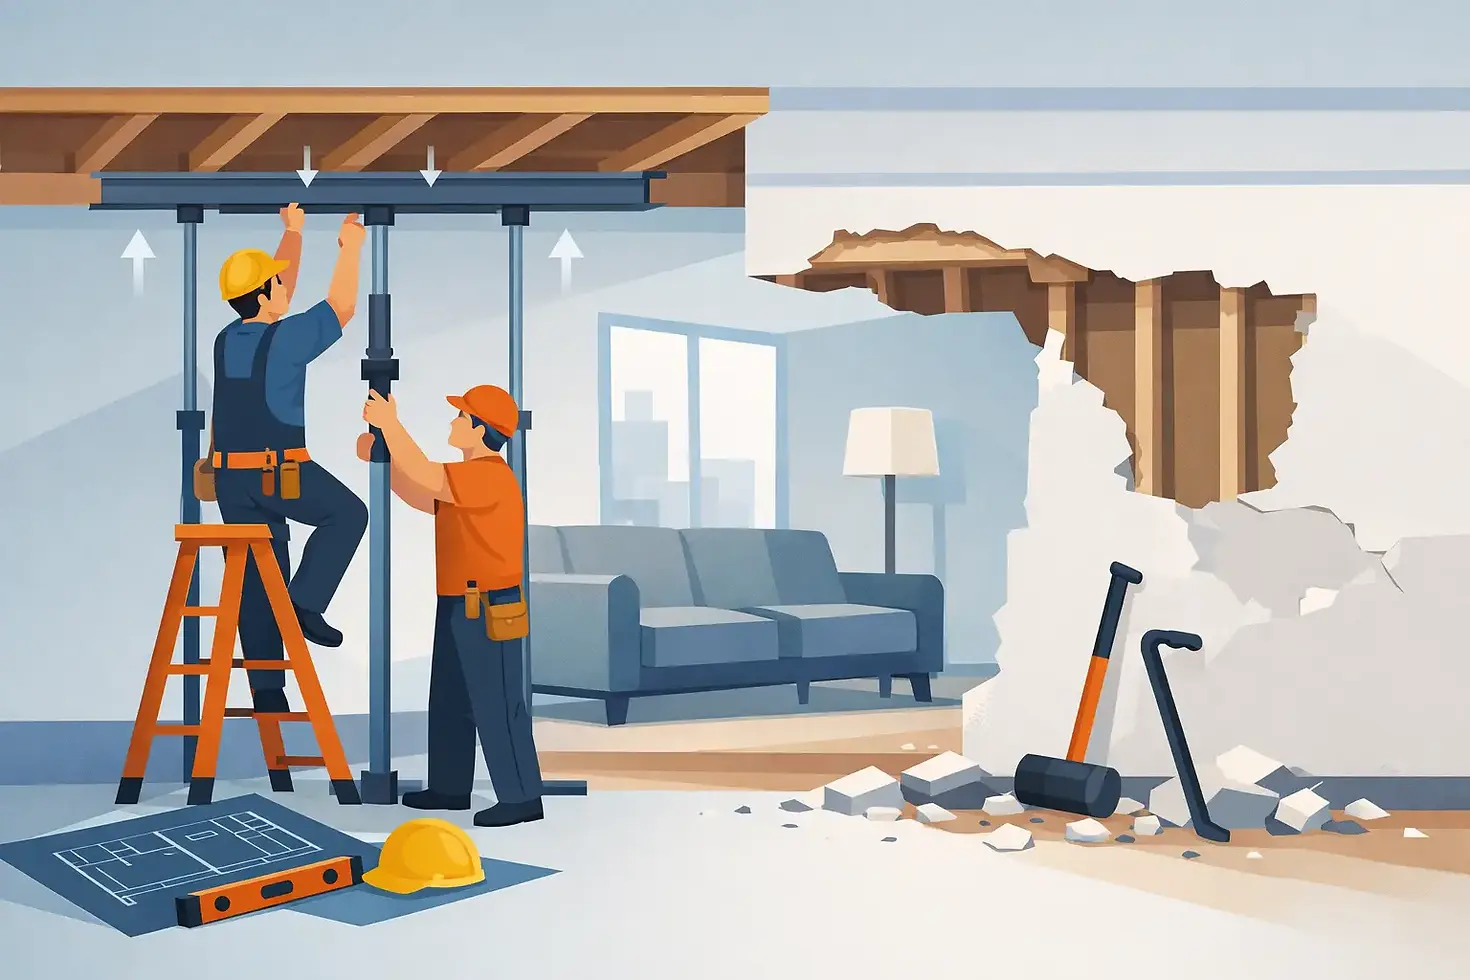
Reinforce Ceiling Before Wall Removal Safely

A wall can look like an easy target when you want a larger kitchen, brighter living room, or true open-concept layout. But before demolition begins, you need to reinforce ceiling before wall removal when that wall supports framing above it. The real question is not whether a wall is in the way. It is where its load goes once the wall is gone.
Removing a load-bearing wall without a proper support plan can cause ceiling sag, cracked drywall, sticking doors, floor movement, and much more expensive repairs later. A practical structural review identifies the load path, sizes the replacement support, and gives your contractor a clear sequence for doing the work safely.
Why the ceiling needs support before wall removal
A ceiling is not a single flat surface. Above the drywall are joists, beams, bearing points, and often another floor or roof structure. A wall below may be carrying all or part of that weight down to the foundation. When you remove it, the load does not disappear. It must transfer through a properly designed beam, posts, and supporting structure below.
In a one-story home, the wall may support ceiling joists and roof loads. In a two-story home, it may also support an upper floor, interior walls, furniture loads, and part of the roof. Homes with attic trusses, vaulted ceilings, additions, or previous renovations can be less obvious. A wall that runs perpendicular to joists is more likely to carry load, but that visual clue alone is not enough to approve demolition.
There is also a difference between temporary support and permanent reinforcement. Temporary shoring holds the structure safely while the existing wall is opened and removed. Permanent reinforcement is the engineered beam and, where required, posts and footings that take over for the wall. Both need to work together. Installing a beam after taking out support is not an acceptable sequence.
Reinforce ceiling before wall removal with a real load path
A safe open-concept conversion starts by tracing the load from the roof or upper floor down to the foundation. This is called the load path. An engineer reviews how joists run, what sits above the wall, the span being opened, and whether point loads can be carried by the floor below.
The replacement beam may sit below the ceiling, be recessed within the ceiling framing, or use a flush beam arrangement. Each option has trade-offs. A dropped beam is often simpler and more cost-effective because it requires fewer framing changes. A flush beam can create a cleaner ceiling line, but it may require modified joists, hangers, and more detailed installation work. The right choice depends on the structure, not only the preferred look.
Posts are another decision homeowners often want to avoid. In some openings, a correctly sized beam can span from exterior wall to exterior wall. In others, posts are necessary. Hiding posts inside side walls, kitchen cabinetry, or a planned island can preserve the design while maintaining safe support. The goal is not to force a no-post solution. It is to find the most practical structural solution for your layout and budget.
A beam is only as reliable as what supports it. If new posts create concentrated loads, the floor framing and foundation below must be checked. A post over an existing beam, foundation wall, or suitable footing may work well. A post landing on an unsupported basement slab may require additional support below. Skipping this review can move the problem from the ceiling to the floor.
What an engineer checks before the work starts
A site visit gives far better information than assumptions based on a floor plan or a few photos. The framing may be visible from the basement or attic, but finished ceilings, bulkheads, ductwork, and past renovations can conceal critical details.
During an assessment, the structural review generally focuses on the opening width, framing direction, roof and upper-floor loads, bearing walls below, foundation conditions, and any existing beams or posts. The engineer also looks for complications that affect construction, such as plumbing stacks, HVAC runs, electrical wiring, masonry chimneys, or steel columns.
For permit work, the final package should clearly show the beam size, material, connection details, post locations, and any required foundation or framing reinforcement. This gives the municipality and contractor the same information. It also reduces job-site guesswork, change orders, and delays caused by a plan that does not match the house.
At JAZ Paramount Engineering Corp., the focus is on practical designs that support the renovation from assessment through permit-ready drawings, construction coordination, and inspection when needed. That means the proposed structural fix should work on paper and make sense for the people building it.
The safe construction sequence
The construction sequence matters as much as beam sizing. Even a properly sized beam can be installed incorrectly if temporary support is placed in the wrong location or removed too early.
First, the contractor exposes enough of the wall and ceiling to confirm the existing framing. This step may reveal doubled joists, old headers, wiring, pipes, or framing changes that were not visible during the initial review. If site conditions differ from the drawings, stop and have the structural plan reviewed before proceeding.
Next, temporary shoring walls are installed on one or both sides of the wall being removed. These temporary walls are built close enough to support the ceiling or floor framing but positioned to leave room for beam installation. The shoring needs a solid bearing surface below. In some cases, the floor beneath it also needs protection or temporary support.
Once temporary support is carrying the load, the existing wall can be removed in controlled sections. The new beam, posts, hangers, and connections are then installed according to the structural drawings. Only after the permanent beam is fully supported and secured should temporary shoring come out.
This is not the stage for improvising. Cutting joists to make a beam fit, omitting a specified hanger, or trimming a post because it appears too tight can compromise the design. Small changes in framing can have large effects on load transfer.
Common shortcuts that create expensive problems
Homeowners are often told that an interior wall is safe to remove because it does not look substantial. That is not a structural assessment. Drywall thickness, a wall’s location, or whether it has a doorway does not prove that it is non-load-bearing.
Watch for these four shortcuts before approving any wall removal:
Removing drywall and studs before temporary shoring is in place.
Using a beam selected from a generic online span chart without verifying the loads and supports.
Setting new posts on a finished floor or slab without confirming what carries the point load below.
Trying to conceal a beam by cutting or altering joists without an engineered flush-beam detail.
Another frequent issue is treating permits as paperwork that can be handled after construction begins. Where permits are required, your municipality may ask for structural drawings and details before approval. Starting without them can create stop-work delays, inspection issues, and added costs to reopen finished work.
Budget for the whole structural change, not just the beam
The visible beam is only one part of the cost. A realistic budget accounts for engineering, permit drawings, temporary shoring, demolition, beam material, posts, connections, electrical relocation, HVAC adjustments, drywall repair, and finishing. If the opening requires new footings or support in the basement, those items should be identified early rather than discovered after the ceiling is open.
There are ways to control costs without cutting structural corners. Keeping the opening slightly narrower may reduce beam size or avoid a difficult support condition. Accepting a dropped beam can lower labor compared with a fully recessed beam. Coordinating electrical, plumbing, and HVAC work before demolition also prevents repeated openings and repairs.
The best savings usually come from clear information at the beginning. A site-specific design lets you compare options before the contractor is standing in a partially demolished room.
When to pause and call for help
Pause the work if you find unexpected steel, a damaged or undersized existing beam, significant rot, insect damage, large cracks, unsupported joist ends, or a wall that does not match the approved plan. The same applies if doors begin binding, the ceiling moves, or temporary shoring appears to settle.
A fast structural review at that point can protect the home and keep the renovation moving. The right answer may be a revised beam, an added post, a new footing, or a different opening layout. It depends on what the structure is actually doing, not what anyone expected it to do.
Your open-concept renovation should feel better when the work is finished, not leave you wondering what is holding up the ceiling. Start with a field review, a buildable support plan, and a contractor who follows the sequence. That is how a larger room becomes a safe, lasting improvement.



Comments